


Want a clean, short haircut that still looks sharp? A mid taper fade buzz cut gives you a uniform buzzed top and sides that blend smoothly from short at the neckline to your chosen length at the temple. It suits busy people, athletes, and anyone who wants a neat look without daily styling.
Below you will find what the cut is, why it trends in 2026, five variations, the exact guard numbers, clipper tips, and a step-by-step home method. You will also see when a barber is the smarter choice and how the costs compare, so you can decide with confidence. Every tip follows standard barbering practice and stays beginner friendly.
What Is a Mid Taper Fade Buzz Cut?
A mid taper fade buzz cut is a short haircut with one even clipper length on top and sides that gradually get shorter toward the neckline and ears. The blend starts around the temple, about halfway up the head.
Two terms often get mixed up, so here is the difference:
- Taper: A soft, subtle blend that keeps a little length at the sideburns and neckline. It looks natural and neat.
- Fade: A faster blend that can drop to the bare skin. It looks bolder and higher in contrast.
A mid taper fade sits between the two. You get a clear gradient without the harsh look of a skin fade. The “mid” part tells you where the blend begins. A low taper starts near the ear, and a high taper starts near the crown.
The “buzz cut” part means the top is cut with clippers and a guard, usually between a #2 and a #4. There is no scissor work and no styling product needed.
Why Mid Taper Fade Buzz Cut Is So Popular in 2026
This cut keeps showing up in barbershops and gym locker rooms for practical reasons. It looks put together, and it takes almost no effort in the morning.
Here is why people choose it:
- Low maintenance: There is nothing to comb, gel, or blow dry.
- Balanced look: The mid blend works with most face shapes, from round to square.
- Hides thinning: A short, even top makes a receding hairline less noticeable.
- Easy in hot weather: Short hair stays cool and dries fast after workouts.
- Works at the office and the gym: It reads as neat in both places.
- Affordable to maintain: Home clippers are cheaper than they were a few years ago, and video tutorials are everywhere.
It also grows out gracefully. Even after three weeks, the taper still looks intentional rather than messy.
5 Mid Taper Fade Buzz Cut Variations
Each version below keeps the same mid taper but changes the top length or the bottom finish. Pick the one that fits your hair texture and daily routine.
1. Classic Buzz with Mid Taper Fade
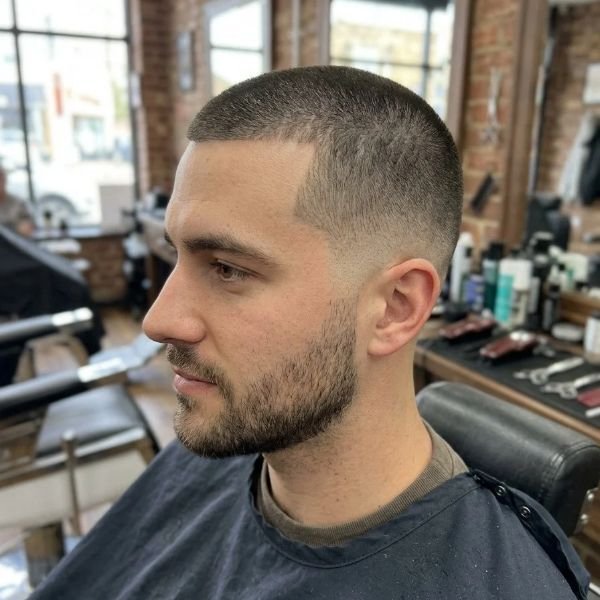
This is the standard version. The top gets one guard, usually a #2 or #3, and the sides blend down from the temple.
It works well for first-timers because the lines are simple. Ask your barber for “a number 3 on top with a mid taper.”
2. Burr Cut with Mid Taper Fade
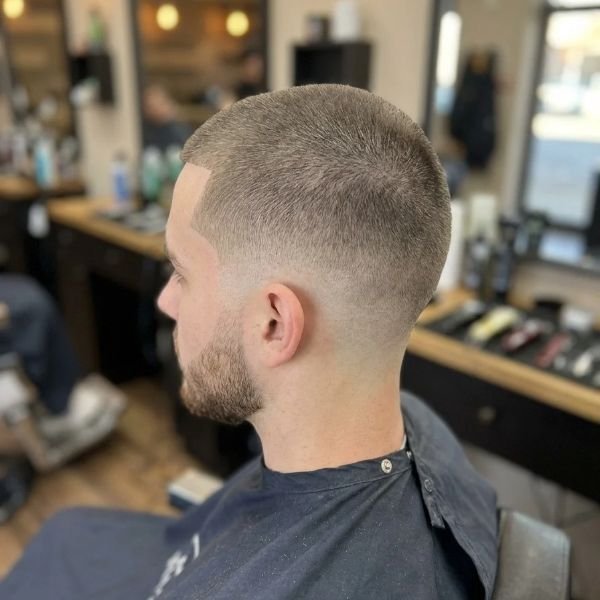
A burr cut is a slightly longer buzz, often a #3 or #4, which leaves about three eighths to half an inch of hair. The extra length softens the look and helps if you have a rounder head shape.
It is also forgiving. Small clipper mistakes are harder to spot on a longer buzz.
3. Textured Buzz with Mid Taper Fade
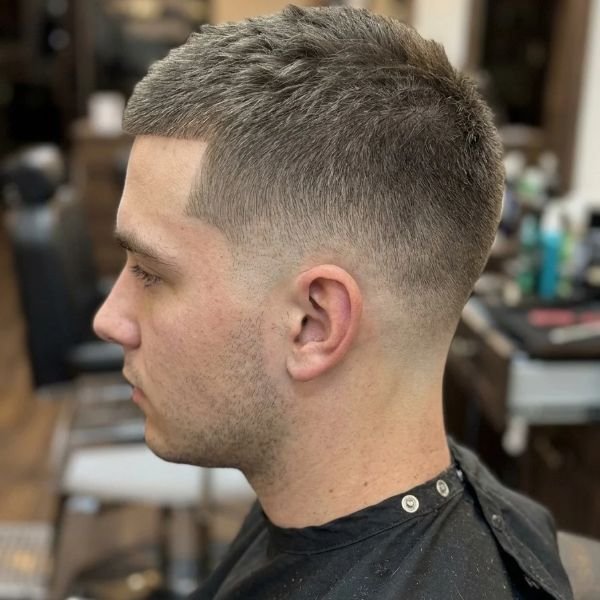
Here the barber cuts the top with a #4 or longer, then adds small point cuts so the hair has some movement. A pinch of matte clay can add grip.
This option suits wavy or curly hair, because the extra length lets natural texture show through.
4. High-and-Tight with Mid Taper Fade
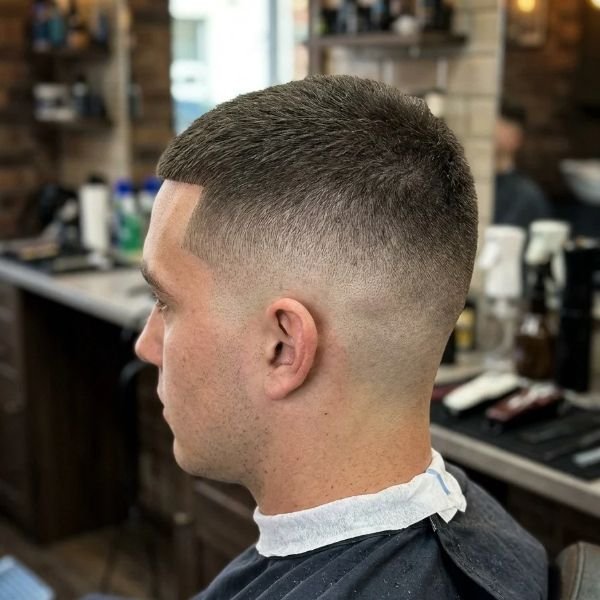
The high-and-tight is a military-style haircut with very short sides and a slightly longer top. When you pair it with a mid taper, the sides stay tight but the blend looks less severe than a full skin fade.
Choose a #2 on top for a sharp, disciplined look.
5. Skin Buzz with Mid Taper Fade
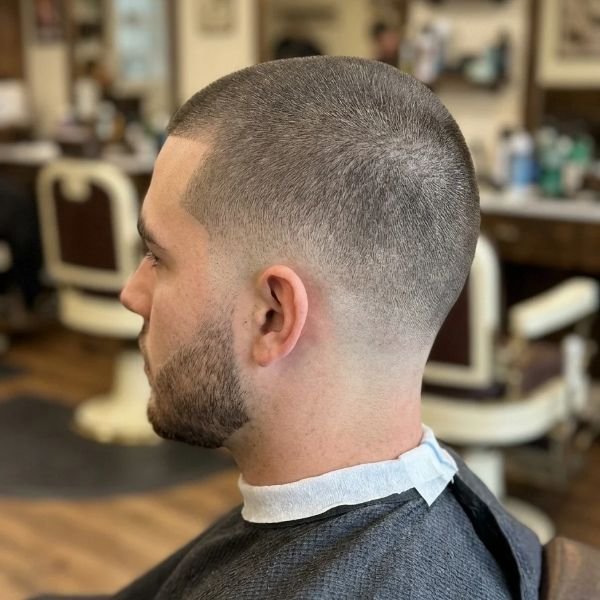
In this version the bottom of the taper goes down to bare skin, while the top stays at a #1 or #2. The contrast is strong, so it looks crisp and modern.
It needs a fresh touch-up every two weeks to stay clean, so it suits people who do not mind frequent upkeep.
Guard Numbers & Clippers for a DIY Buzz Cut
Getting the numbers right is half the job. Guards are the plastic or metal combs that snap onto your clippers and control how much hair gets cut.
Guard Number Chart for the Top
| Guard | Length (inches) | Length (mm) | Best used for |
| 0.5 | 1/16 | 1.5 | Bottom of the taper |
| 1 | 1/8 | 3 | Lower fade and short buzz |
| 2 | 1/4 | 6 | Short buzz and mid blend |
| 3 | 3/8 | 10 | Classic buzz top |
| 4 | 1/2 | 13 | Burr cut and textured buzz |
| 5 | 5/8 | 16 | Longer top, softer look |
Choosing Clippers for a Buzz Cut
You do not need a pro kit, but a few features matter a lot:
- Taper lever: This small switch on the side lets you adjust blade length between guard sizes. It is the key to a smooth blend.
- Sharp, adjustable blade: Dull blades pull hair and leave uneven patches.
- Battery life: Look for at least 90 minutes of cordless run time, so you never stop mid-cut.
- Secure guards: Guards that pop off can leave a bald patch in one second.
- Comfortable weight: You will hold the clippers at awkward angles on the back of your head.
Brand names you will see often include Wahl, an American maker whose cordless models are common in barbershops, and Andis, a professional brand known for durable corded clippers. BaBylissPRO is another trade favorite. Any of these will do the job if the model has a taper lever.
Tools That Make the Blend Easier
Clippers are only one part of the setup. These extras make the job cleaner:
- Barber comb: Lifts hair so clippers cut evenly.
- Two mirrors: One in front and one handheld to see the back.
- Trimmer or detailer: For the neckline, sideburns, and ear edges.
- Cape or old towel: Keeps hair off your clothes.
- Spray bottle: Light dampness helps hair lie flat, though buzz cuts are usually cut dry.
- Clipper oil and brush: Keeps the blades smooth and clean.
How to Do a Mid Taper Fade Buzz Cut at Home
Set aside about 45 minutes your first time. Work in good light, and stand in front of a large mirror.
Step-by-Step DIY Process
- Start with dry, clean hair. Comb it out so there are no tangles.
- Check your guards. Lay them out in order from the longest to the shortest.
- Buzz the top first. Attach your chosen guard (for example, a #3) and run the clippers from front to back. Go against the grain of your hair growth for an even result.
- Mark the fade line. Hold the comb flat at your temple, roughly level with the outer edge of your eyebrow. This is where the blend begins.
- Cut the lower sides. Use the #1 guard from the ear up to the fade line.
- Add the shorter zone. Switch to the #0.5 guard or open the taper lever, and cut just the bottom third of the sides and back.
- Blend the zones. Use short, flicking strokes, tilting the clippers away from your head at the end of each pass. Do not leave hard lines.
- Clean the edges. Use a trimmer around the ears, sideburns, and neckline. Keep the shape natural.
- Check from every angle. Use the handheld mirror to look at the back, and fix any spots that look uneven.
Brush off loose hair, rinse, and moisturize your scalp. Short hair shows dryness quickly.
Common DIY Mistakes to Avoid
Most home haircut errors are easy to prevent. Watch out for these:
- Starting too short: You can always go shorter, but you cannot add hair back.
- Skipping guards: Jumping from a #3 straight to a #0.5 leaves a visible line.
- Cutting with the grain at the sides: The guard may skim over the hair and leave it longer than planned.
- Pressing too hard: Heavy pressure can cause razor-bump irritation.
- Ignoring the back: Without a second mirror, the nape often turns out crooked.
- Using dull or dirty blades: Oil and clean the blades before each cut.
When to See a Professional Instead
Home cutting is not for every situation. Book a barber when:
- You are cutting a skin fade and want crisp contrast.
- You have a strong cowlick or swirl, which can be hard to predict.
- You need a sharp line-up or edge up around the forehead.
- You have an event soon and cannot risk a mistake.
- You tried the cut once and the blend still looks uneven.
A barber can also fix a home haircut gone wrong, usually by taking everything a little shorter.
Professional Barber vs DIY — Cost & Time Comparison
| Factor | Barber | DIY at home |
| Cost per cut | About $30 to $50 before tip | Nearly $0 after the kit |
| Upfront cost | None | About $60 to $150 for clippers and tools |
| Time per cut | 30 to 45 minutes, plus travel and waiting | 30 to 60 minutes at first, 20 to 30 once practiced |
| Typical schedule | Every 2 to 3 weeks | Every 1 to 2 weeks if you like it very crisp |
| Result quality | Consistent and sharp | Improves with practice |
Is It Worth Cutting a Buzz Cut Yourself?
For most people with straight forward hair, yes. If you visit a barber every two to three weeks at $35 a cut, you spend roughly $600 to $900 a year before tips. A decent clipper kit pays for itself within three to four months.
The catch is the learning curve. Your first two or three cuts may look a bit rough, and the back of your head is the hardest part. A good compromise is to get a professional cut once a month and use your clippers to maintain it between visits.
Mid Taper Fade Buzz Cut — Video Guide
Watching someone cut hair makes the blending motion much easier to understand than text alone. Embed your chosen tutorial video here.
When you pick a video, check that it:
- Shows the fade line placement at the temple
- Names the guard numbers used at each step
- Demonstrates the flicking motion for blending
- Includes a rear view of the head
- Finishes with edge cleanup
Watch: Mid Taper Fade Buzz Cut Tutorial
[Insert video embed here]
Pause the video after each guard change and compare it with your own mirror. Practice the blending stroke on the sides before you touch your top. If your result differs from the video, take small steps and fix it with the next shorter guard rather than cutting more.
Frequently Asked Questions
What is a mid taper fade buzz cut?
It is a buzz cut with an even short top and sides that blend gradually shorter from the temple down to the neckline.
What guard number is best for a mid taper buzz cut?
A #2 or #3 on top works for most people. The sides step down through #2, #1, and #0.5.
Is a mid taper the same as a mid fade?
No. A taper is a softer blend that keeps some length, while a fade can go down to the skin and looks bolder.
How often should I get a mid taper fade buzz cut?
Every two to three weeks keeps the lines clean. Skin versions may need a touch-up every two weeks.
Can I cut a mid taper fade buzz cut myself?
Yes, if you have clippers with guards and a taper lever. Take it slowly, and start with longer guards.
Does a mid taper buzz cut suit curly or thin hair?
Yes. Curly hair looks great with a #3 or #4 top, and thin hair looks fuller with a short, even buzz.
What clippers are best for a DIY buzz cut?
Choose cordless clippers with a taper lever, a sharp blade, and at least 90 minutes of battery life.
About the Author
[Author Name] is a [grooming writer / licensed barber / hair stylist] with [X] years of experience cutting and teaching men’s haircuts. They test clippers and guard setups at home and in the shop, and they update this guide regularly. Add your credentials, a short bio, and a link to your profile here so readers can see the experience behind the advice.
Conclusion
The mid taper fade buzz cut is simple, sharp, and easy to live with. The mid taper blend gives it more polish than a plain buzz, and the five variations let you adjust the look to your hair and lifestyle.
With the right guard numbers, a clipper that has a taper lever, and a calm step-by-step approach, you can do a solid version at home. Start with a longer guard, blend in small steps, and see a barber when you want extra precision. Either way, you end up with a neat, low-effort haircut that works every day.

Liam Joseph Miller is a fashion and lifestyle writer passionate about modern trends, personal style, outfit inspiration, and everyday fashion. He enjoys creating simple, practical content that helps readers discover new looks, explore current trends, and express their unique sense of style with confidence.